
Picking The Right Polishing Combination


The ability to pick the right pad and polish abrasive is essential in producing the best defect-free paintwork; It is also a knowledge and skill any professional detailer needs to possess.

Mastering this skill means reducing the guesswork on polishing combination, and being more efficient and effective in tackling different types of paints and defects. It also grants us the competence to restore any paintwork type without fear or favour.
Here are 4 things to get familiar with polishing combinations!
- Cutting Strength of Pads
- Cutting Strength of cutting abrasives
- Combination and cutting strength
- Cutting results & leftover defects (Overcut & undercut)
1) Identify And Segregation of Cutting Strength Of Pads
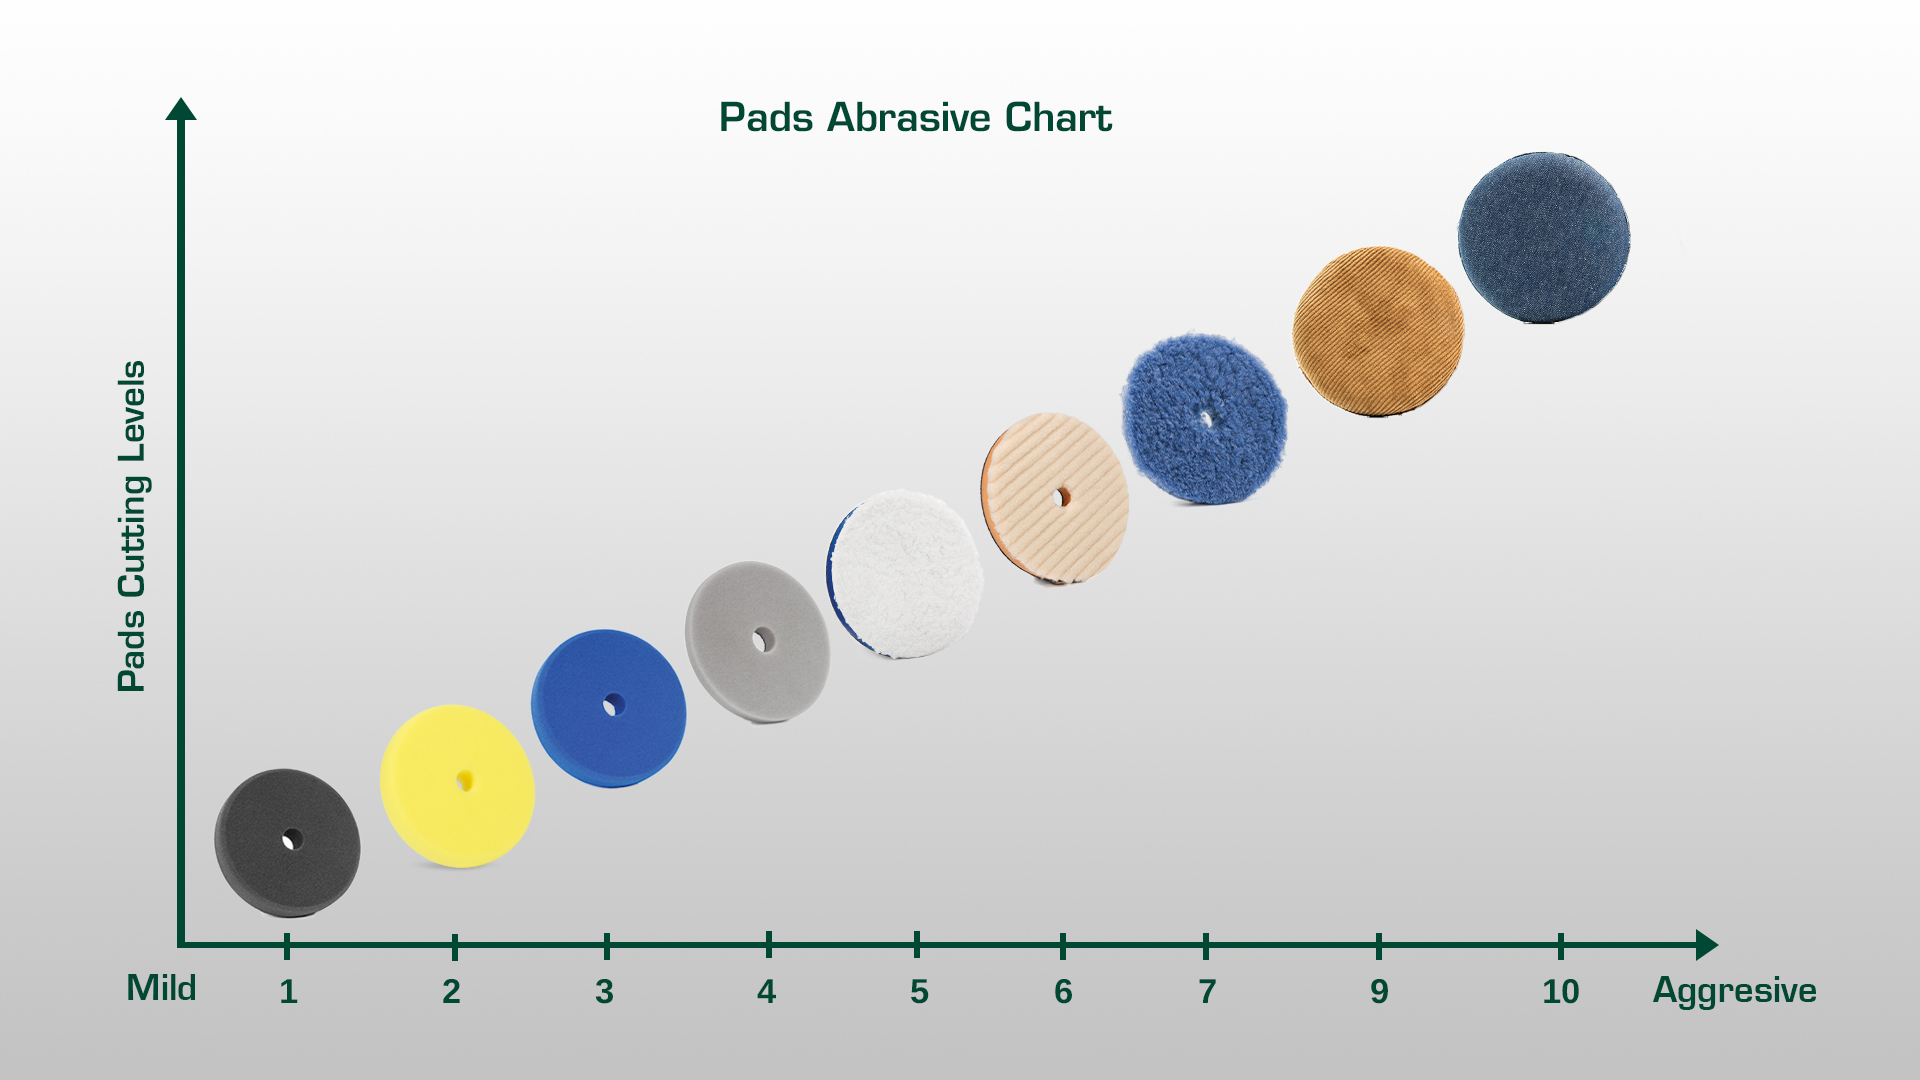
Each pads renders a different level of cut, so understanding our choice of pads at hand is essential. In general, there will be leveling pads, wool pads, microfibre pads and foam pads. Arrange pads at hand from the most aggressive to less aggressive to get an idea of cutting strength that each possesses.
The idea here is forming an arrangement of pads that we can access when we need to step up(higher-cut pads) or step down (lower cut pads).
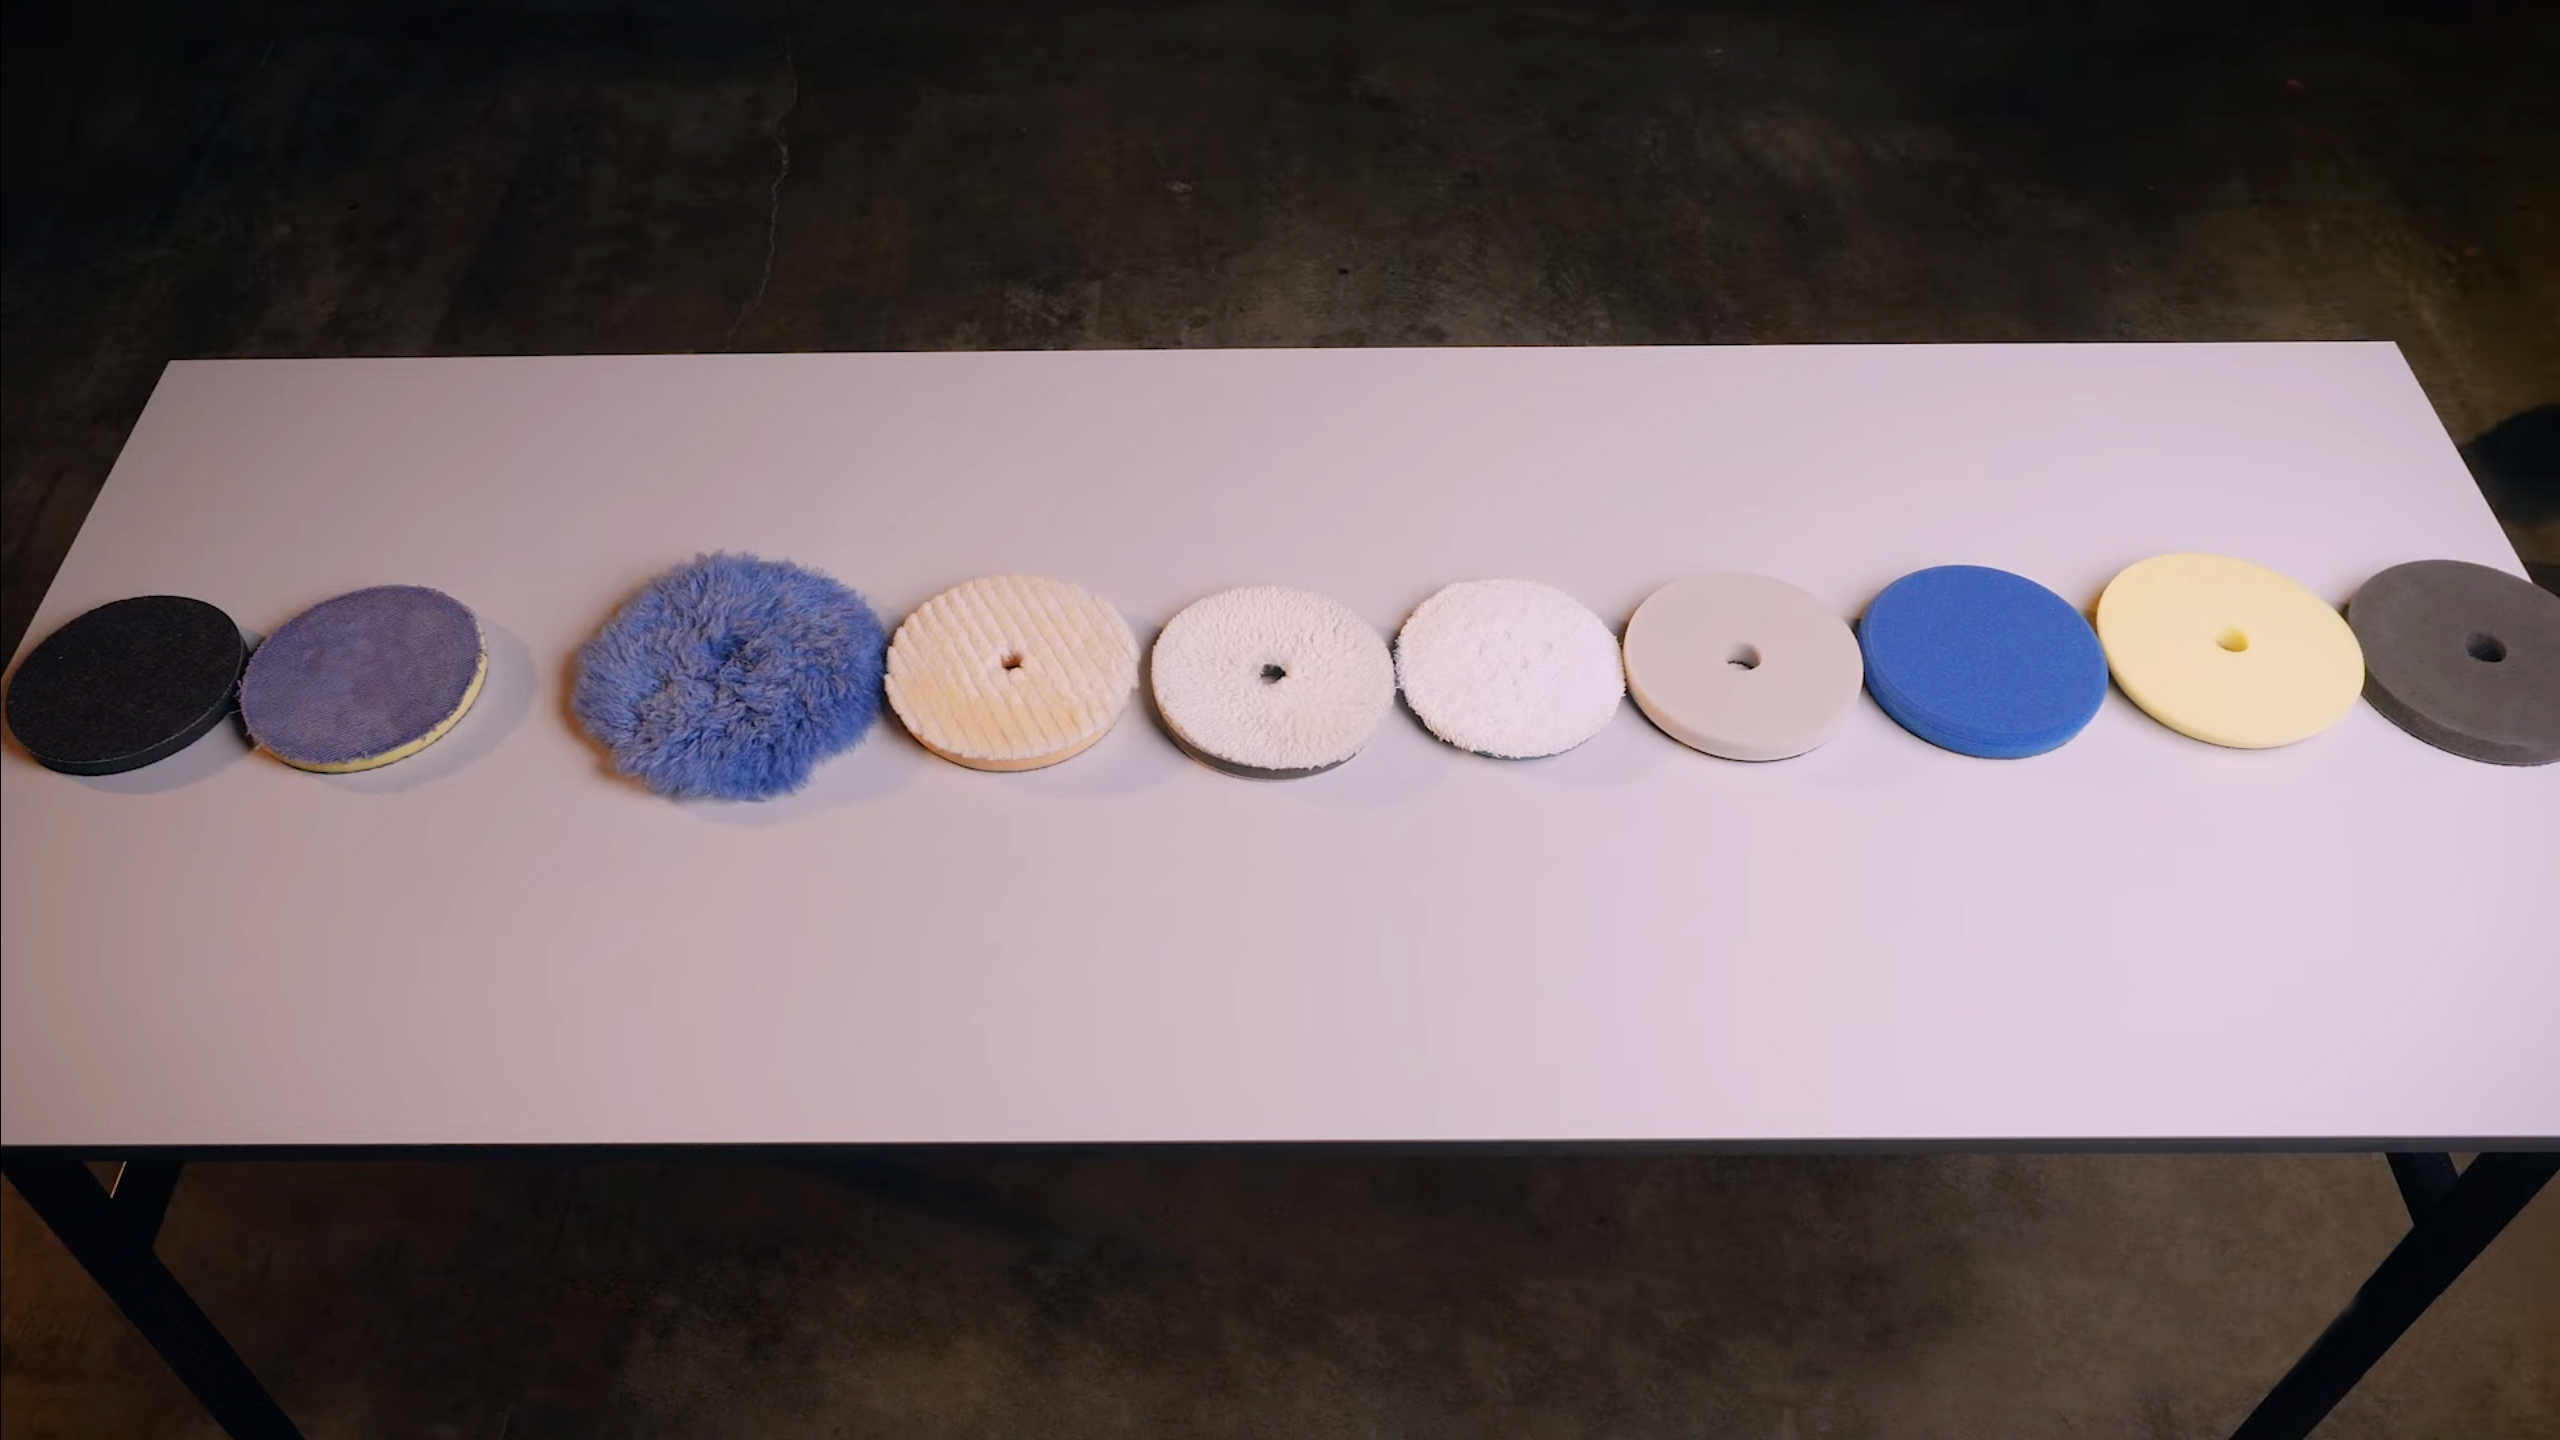
An example of pads that are used in detailing.
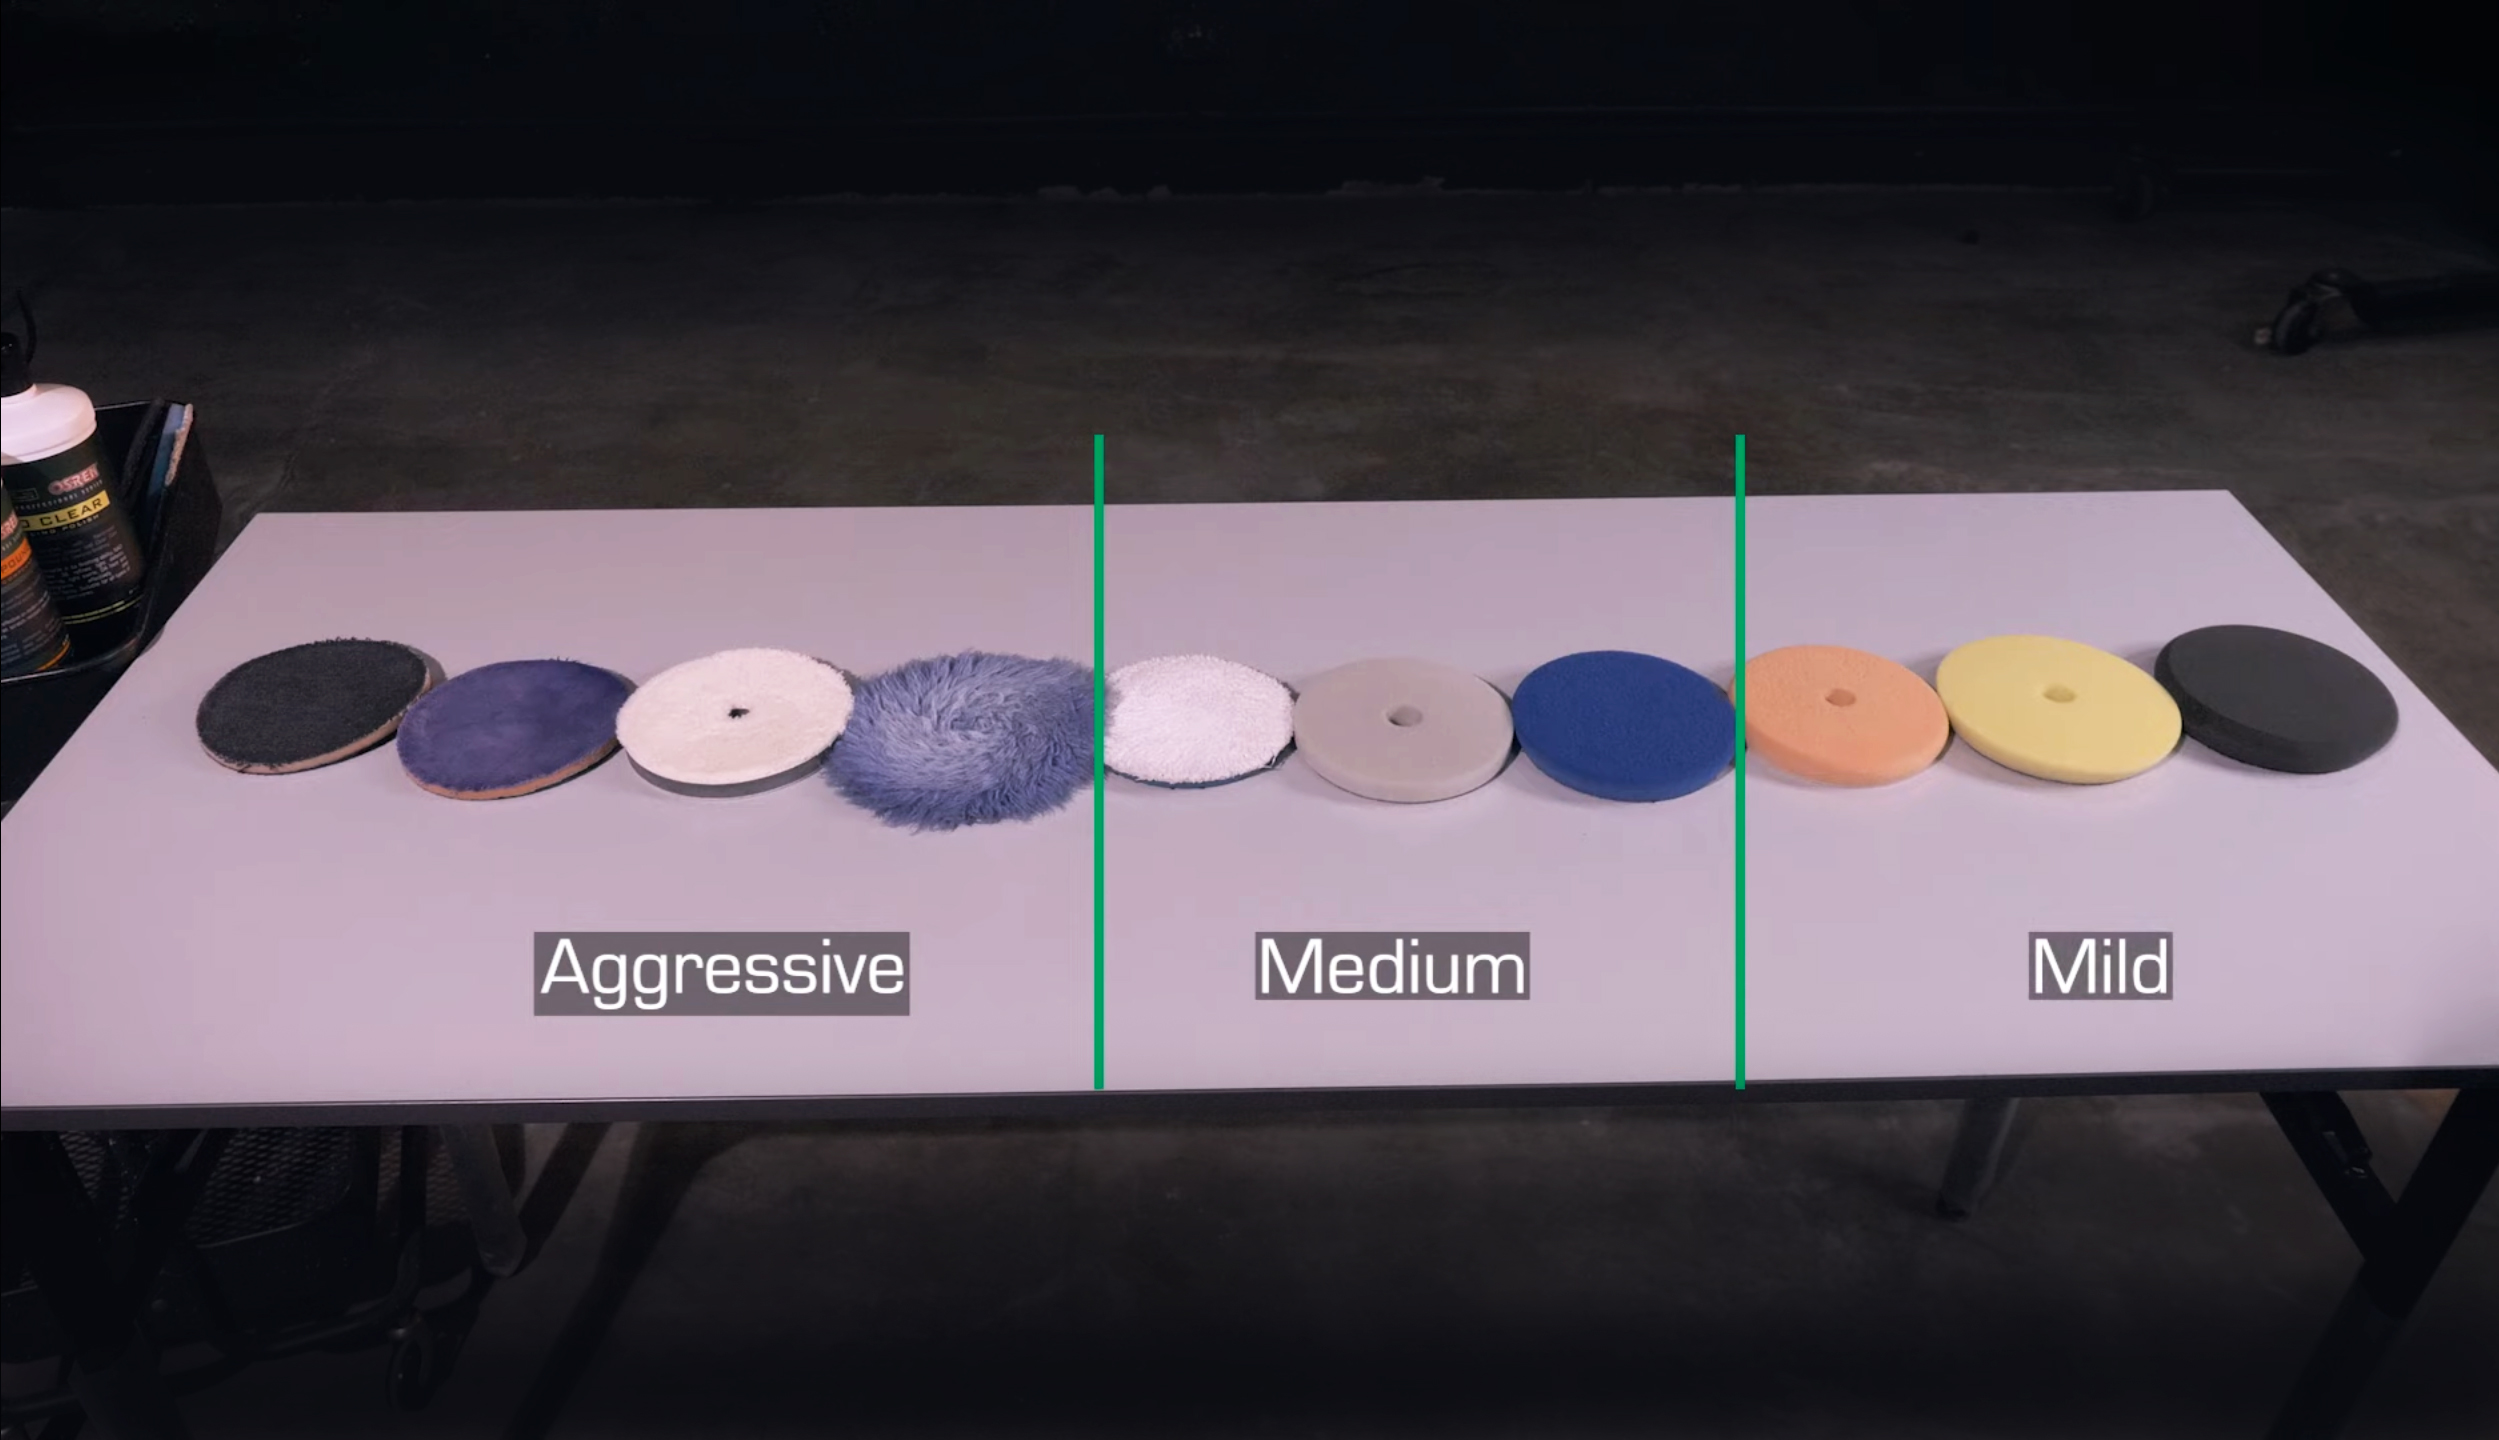
Arrangement of most aggressive to least aggressive pads
2) Identify and Arrangement Of Cutting Strength Of Cutting Abrasives
Similar to identifying cutting strength of pads, different cutting abrasives also render different levels of cuts. A ‘compound’ is generally used for the removal of heavier swirls and severe defects, while ‘polish’ is for lighter defects and refinement.

For example both OSREN’s NAO Compound 46 and NAO Quick Cut 48 are abrasives for the removal of heavy defects, while the NAO Polish 38 is suitable for the removal of micro-swirls, haze and as a finishing abrasive.
Identify the arrangement of abrasives and arrange them accordingly.

Here’s a sample based on OSREN Abrasive Products
3) Combination and Cutting Strength (Pads + Abrasives)
Pairing an aggressive pad and an aggressive abrasive will naturally produce a high cutting strength combination, and vice versa.
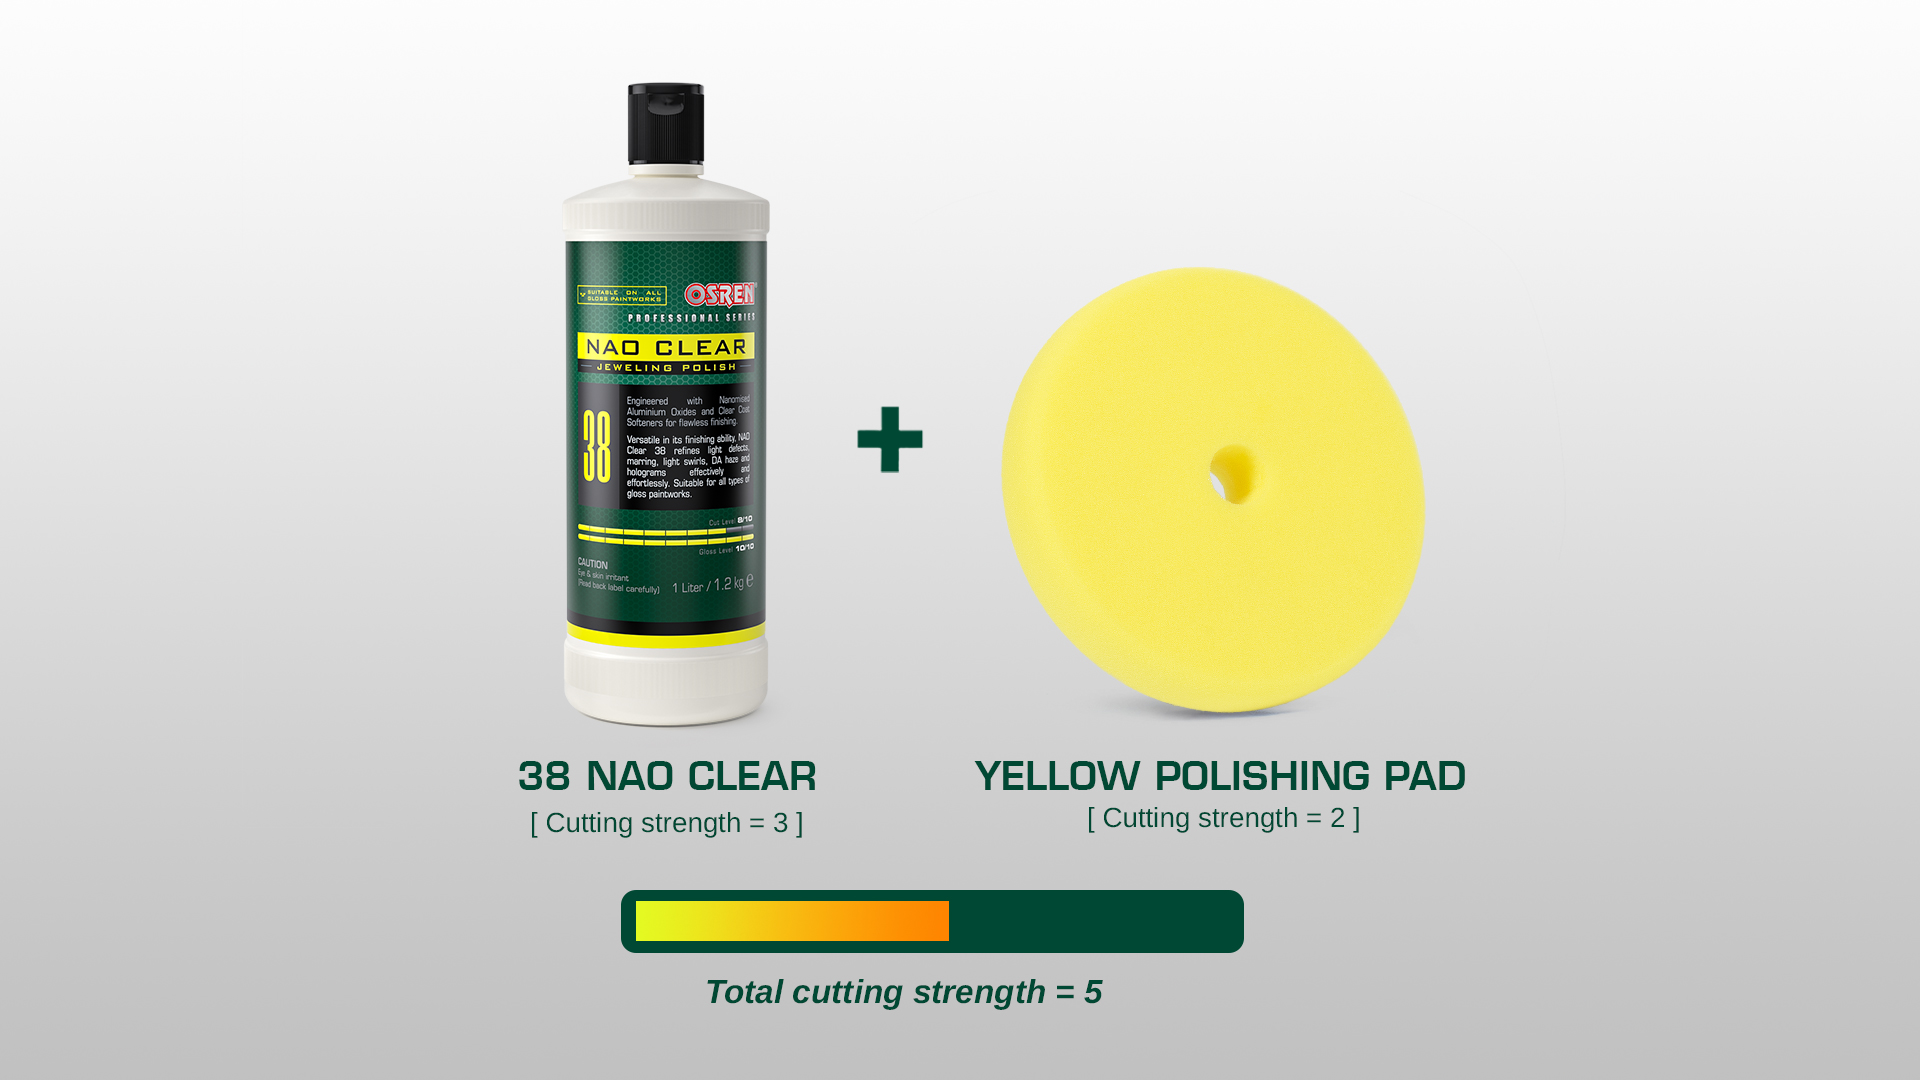
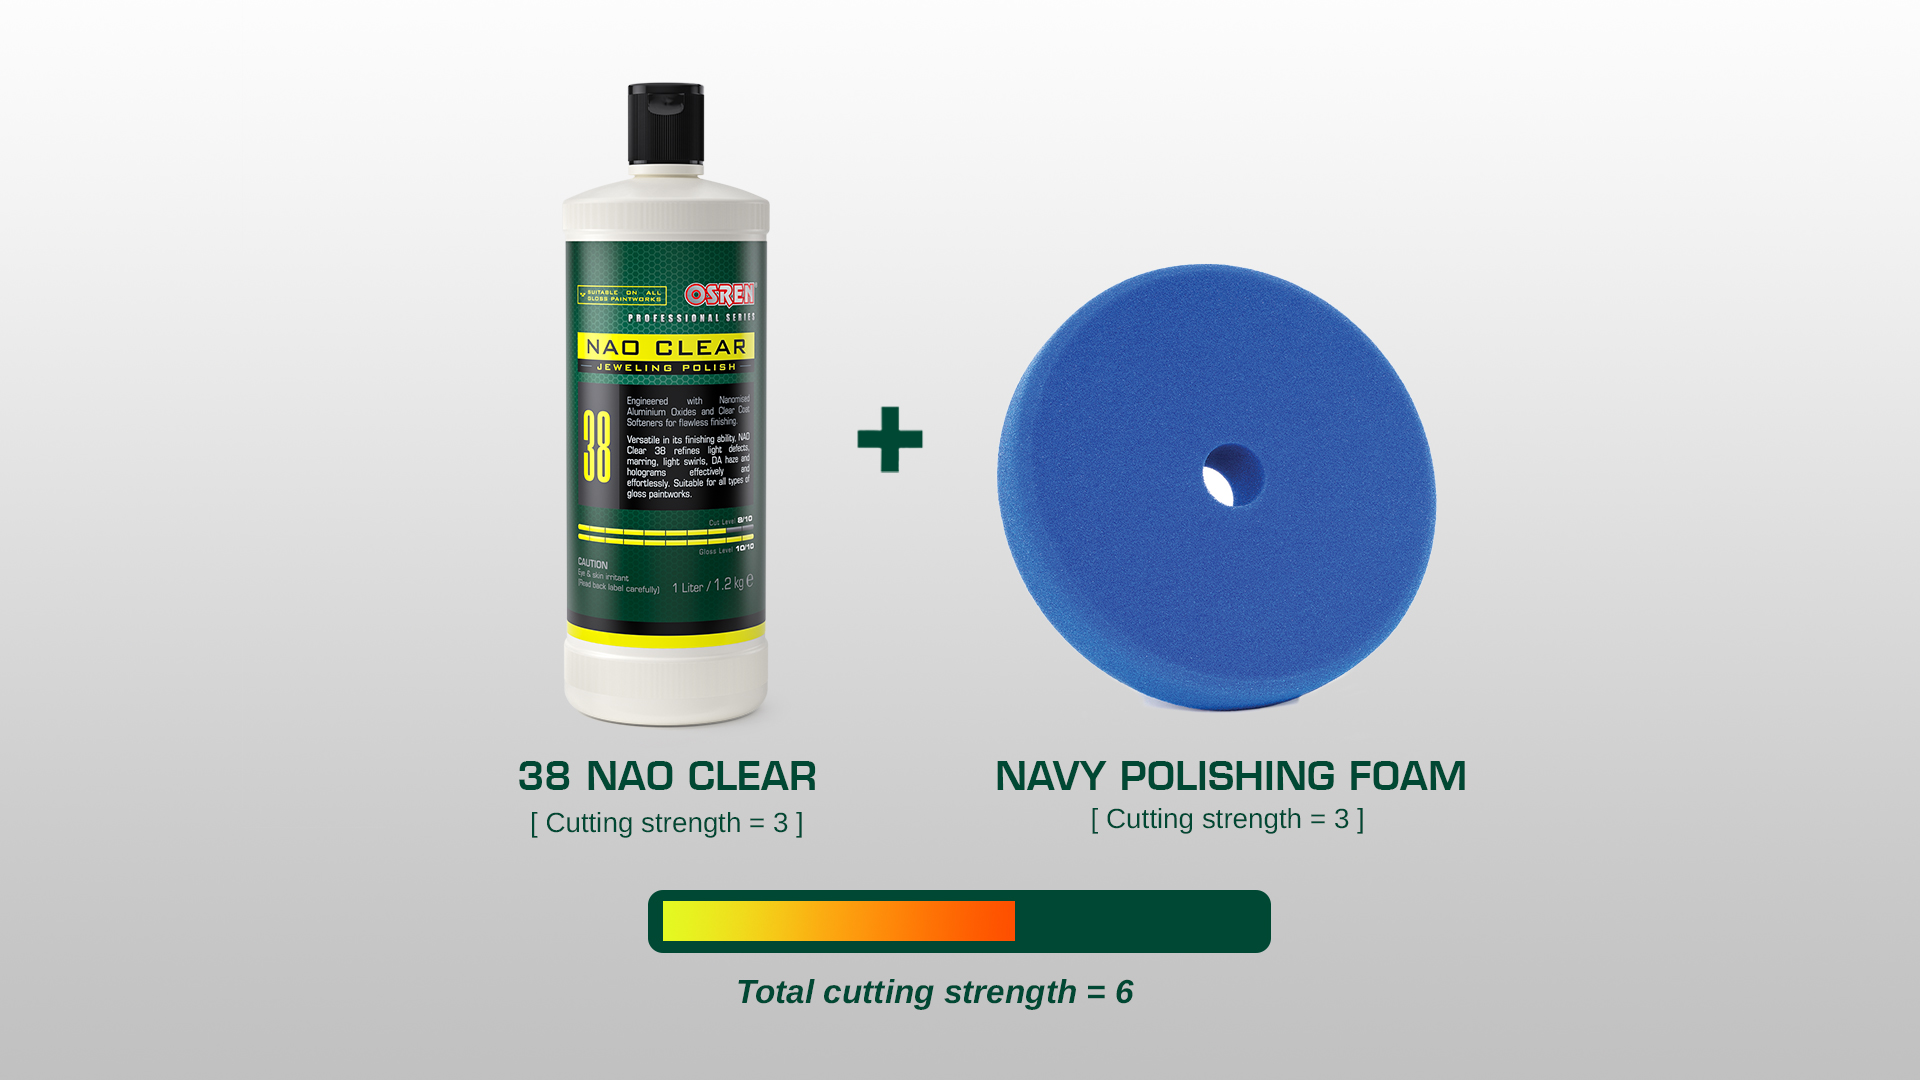
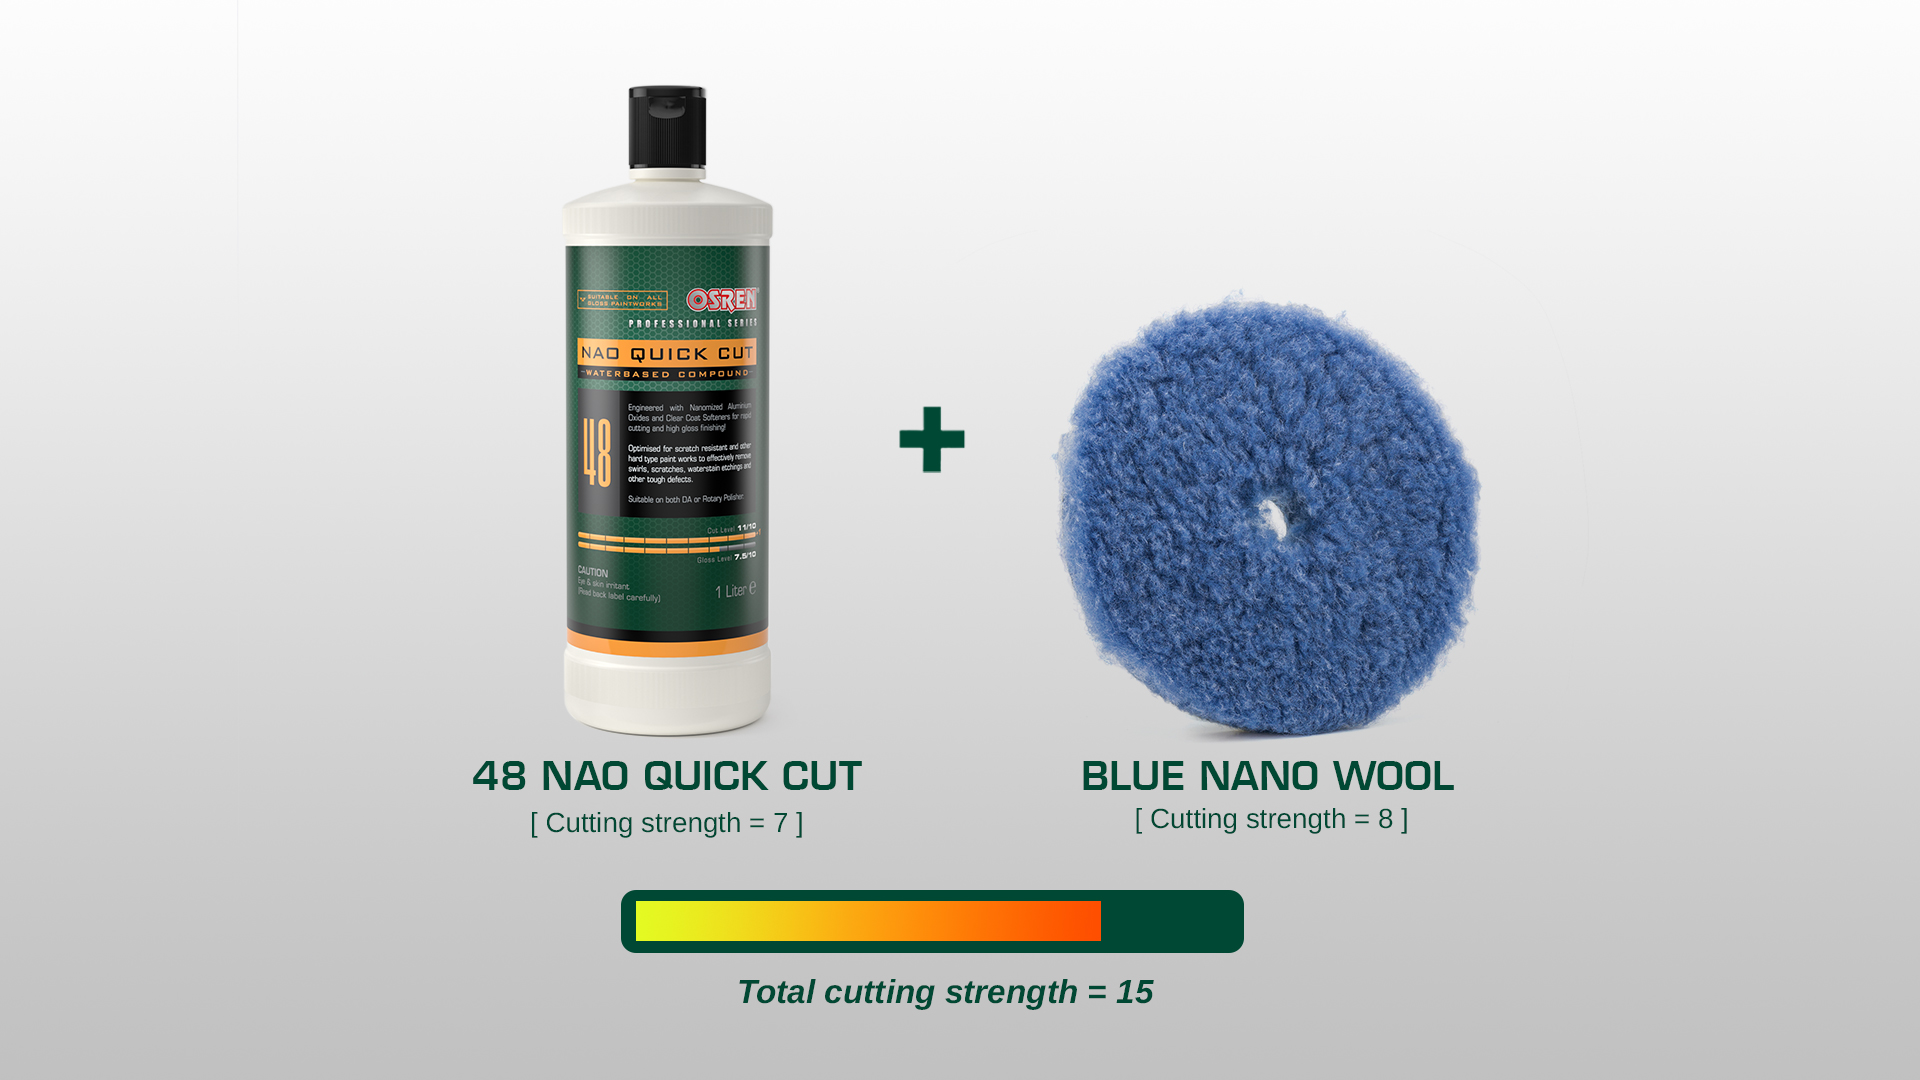
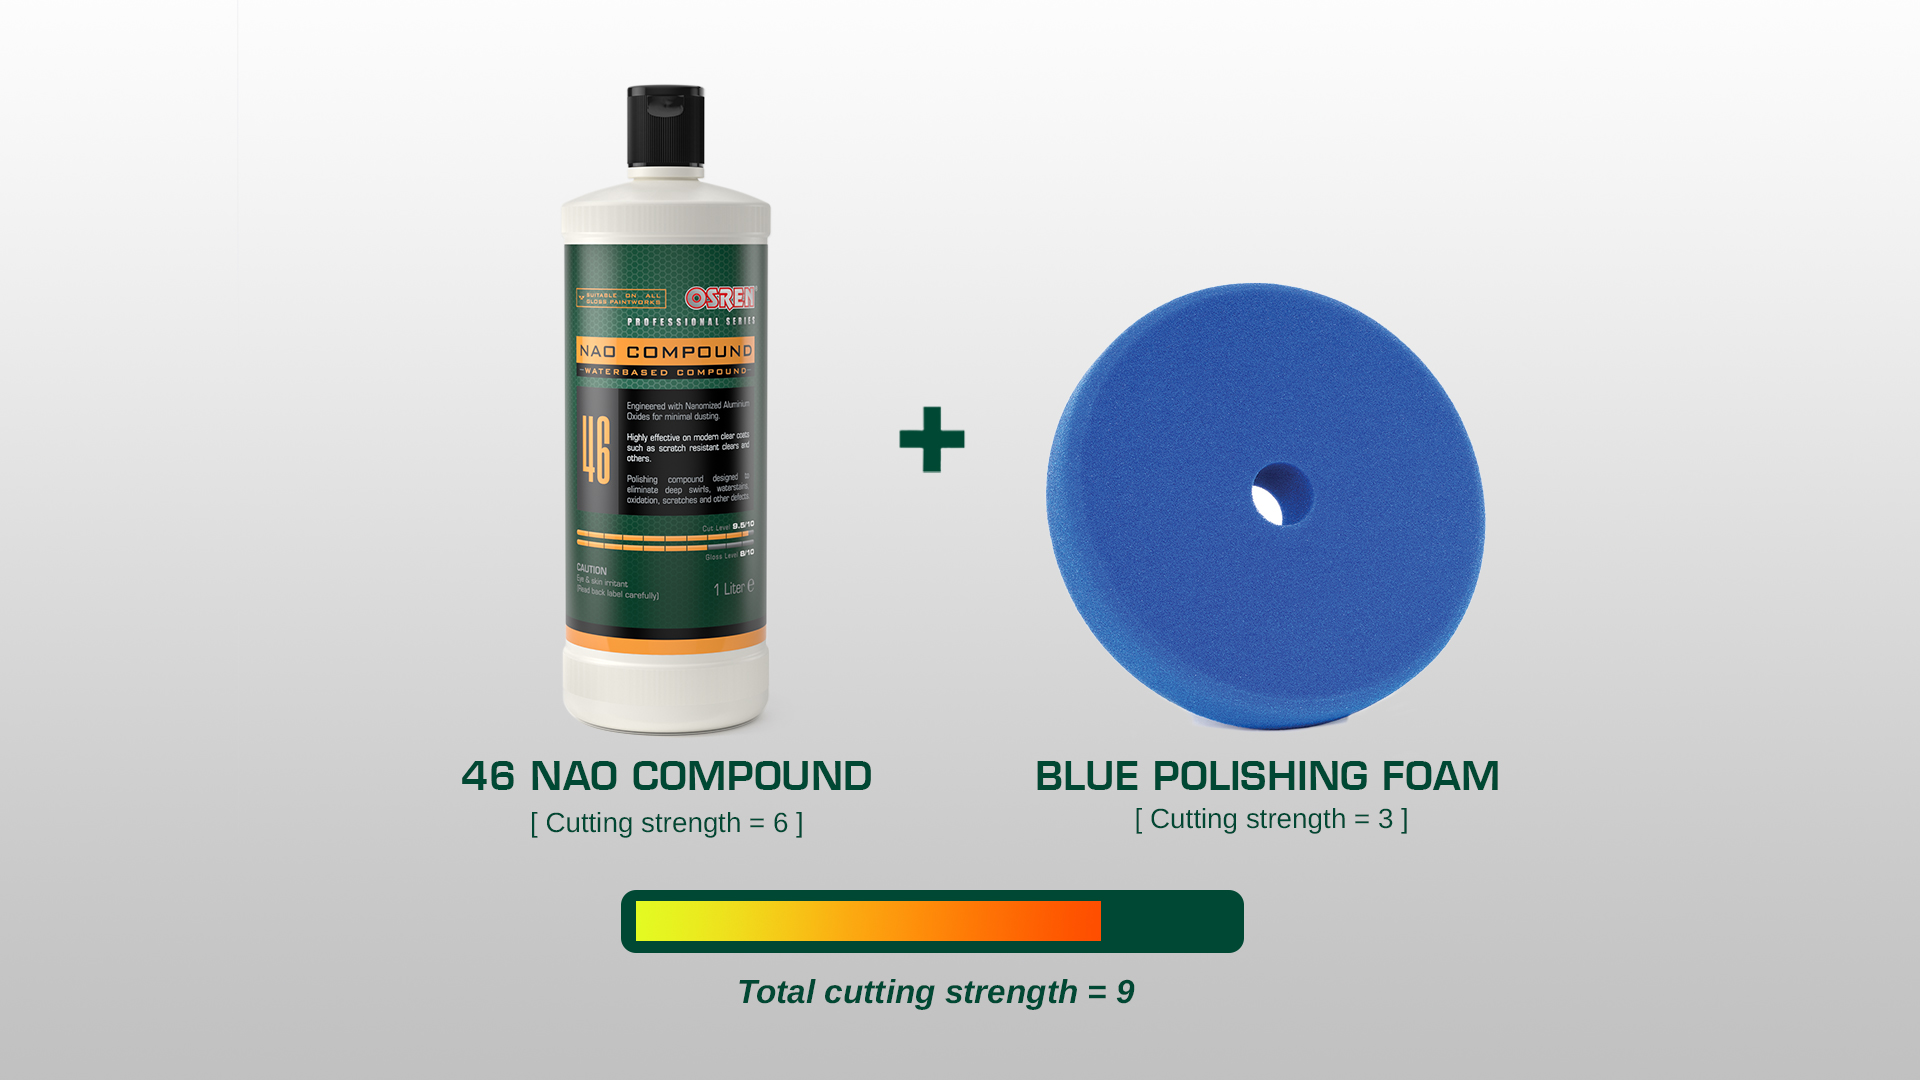
A trick to understanding cutting combinations better is to indicate each abrasive and pad with a ‘cut level’ based on what you own, with the least aggressive pad or abrasive as 1, and the most aggressive pad or abrasive as 10.
For example, if the softest (least aggressive pad) I have at hand is the black finishing pad, it shall be listed as 1. While the most aggressive pad can be a 10. (if you have more than 10 pads, the numbers can be higher ie: 1-15)
Both pads and abrasives should be indicated, and the number is intended as an indicator, it does not need to be exact.
Here’s an example:

And using a simple (add) equation should give a rough indicator of how much cutting strength is given with the pad and abrasive combination.
Typically, wool and microfibre cutting pads are used for higher cutting/compound, while microfibre polishing pads and polishing foam pads are used for polishing or refining compounding marks (micro-swirls/hologram/haze)
So how do we put this information to use?
The combined figures set up an implication of knowing where each combination of pads and abrasives renders.
For example, pairing a nano blue wool pad + Nao Compound 46 renders a cut strength of 14. When this combination doesn’t provide us with sufficient cut strength, any combination of >14 is required.

Therefore, we have selections of combinations that we may choose from.
On the contrary, if a cut strength of 10 generates too much cut (more/deeper defects produced), we are required to step down, and any combination of <10 can be used to refine.
4) This brings us to our next question. How do we know if our cutting is sufficient or insufficient?
By observing and comparing defects on a panel, here are ways we can tell if we achieve:
- Overcut
- Insufficient cut
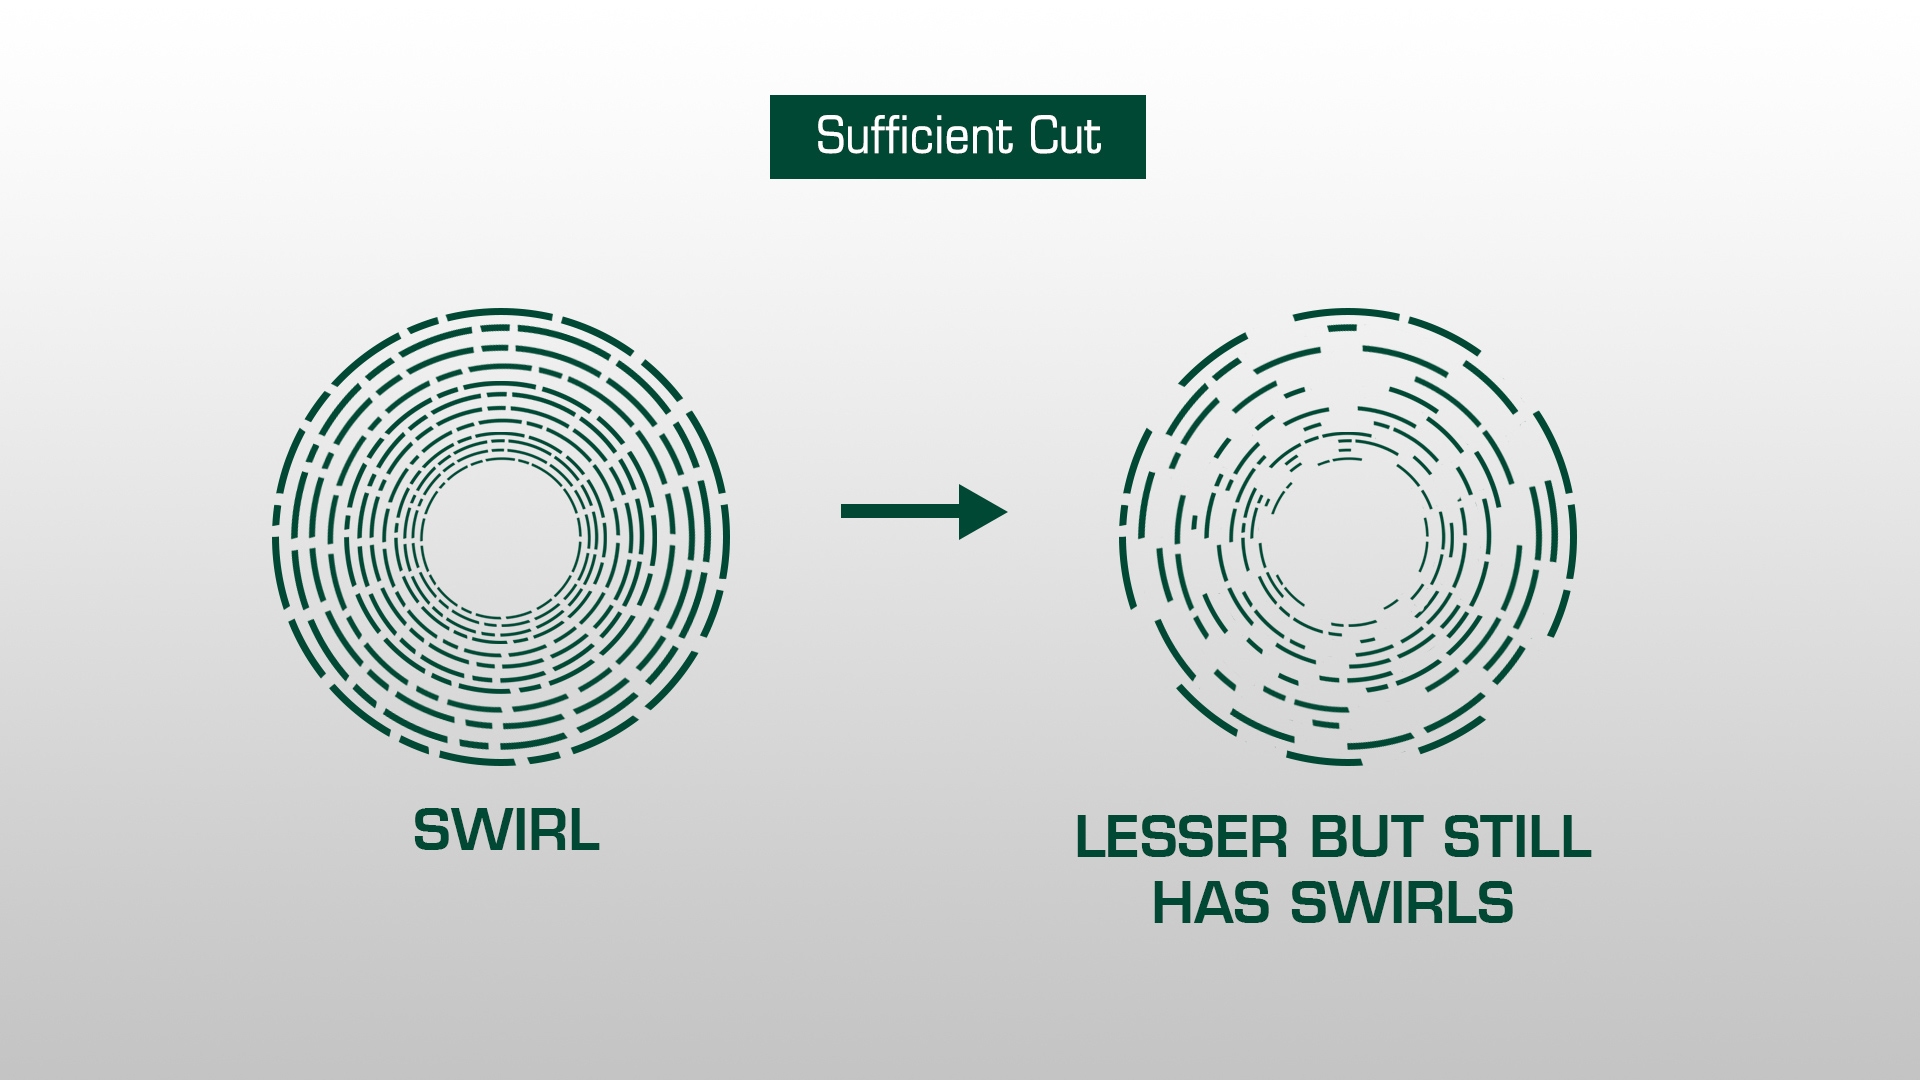
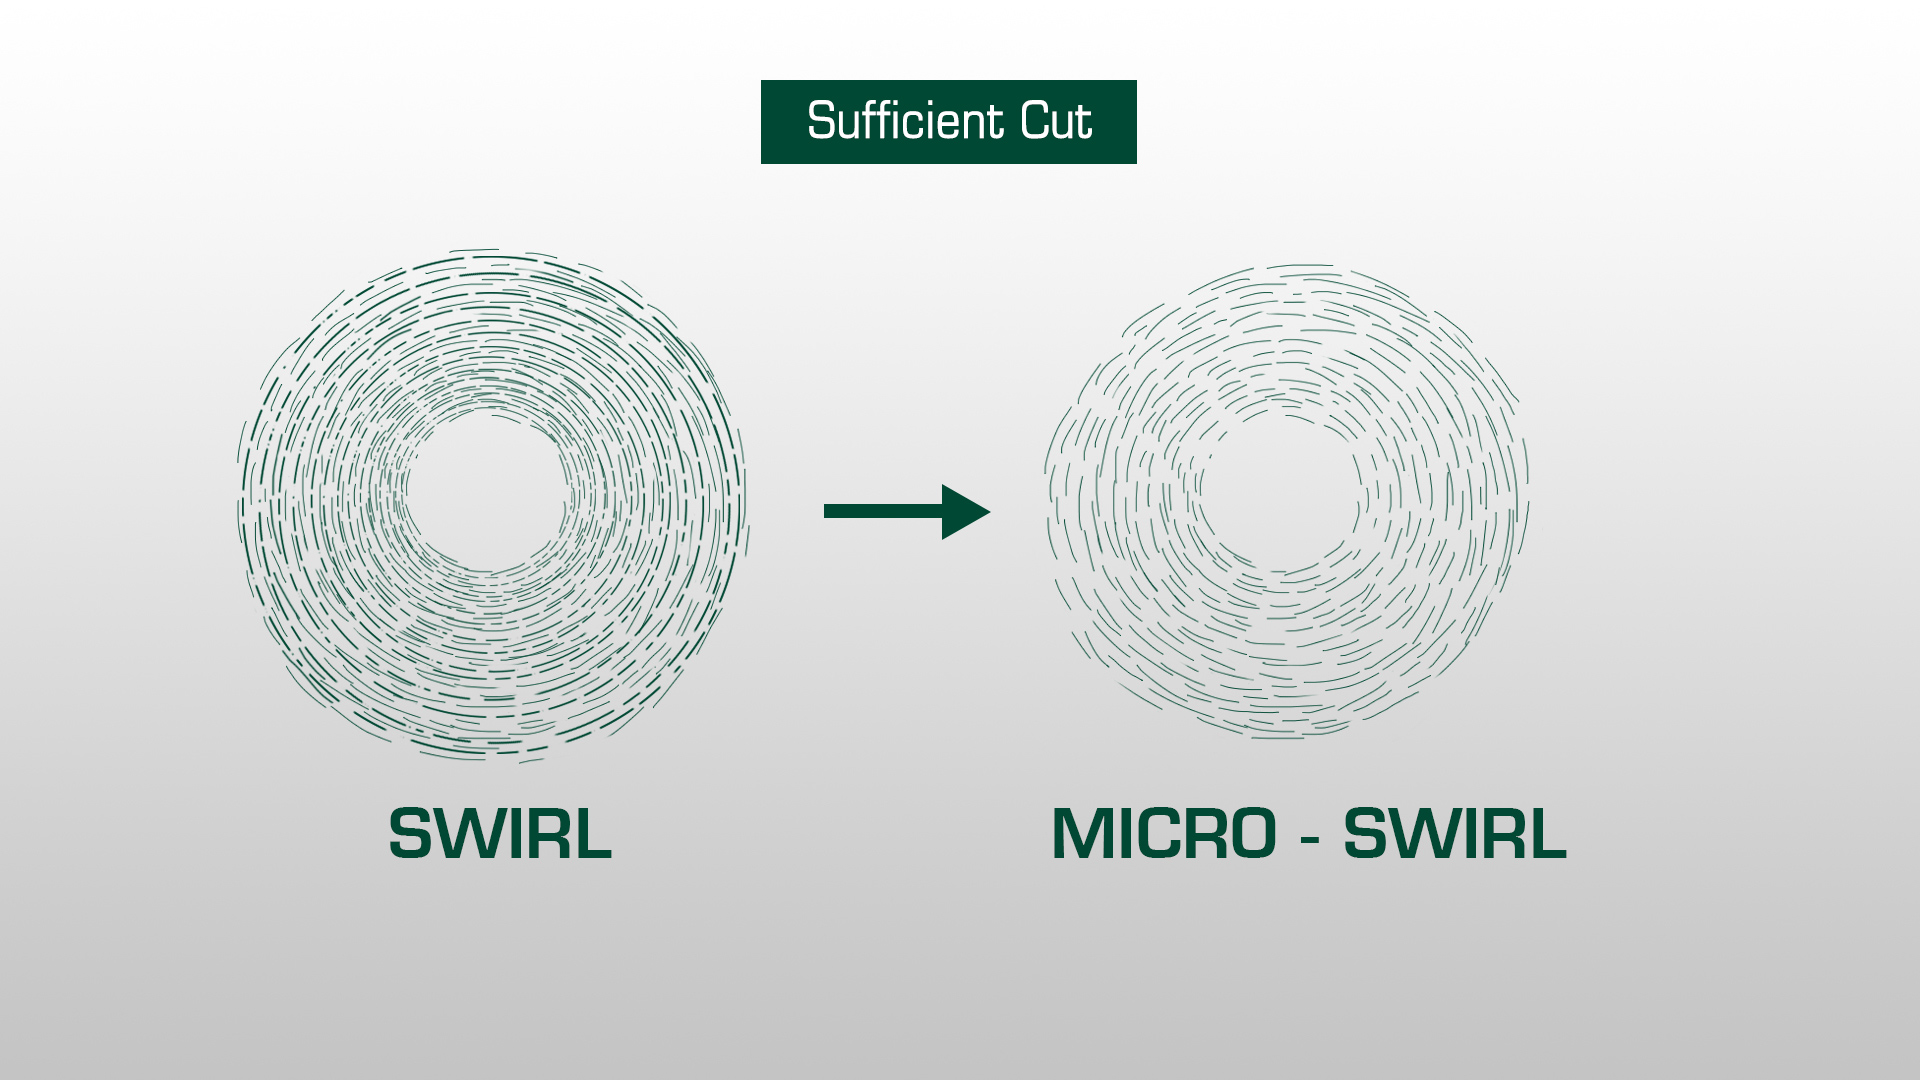
- Sufficient Cut
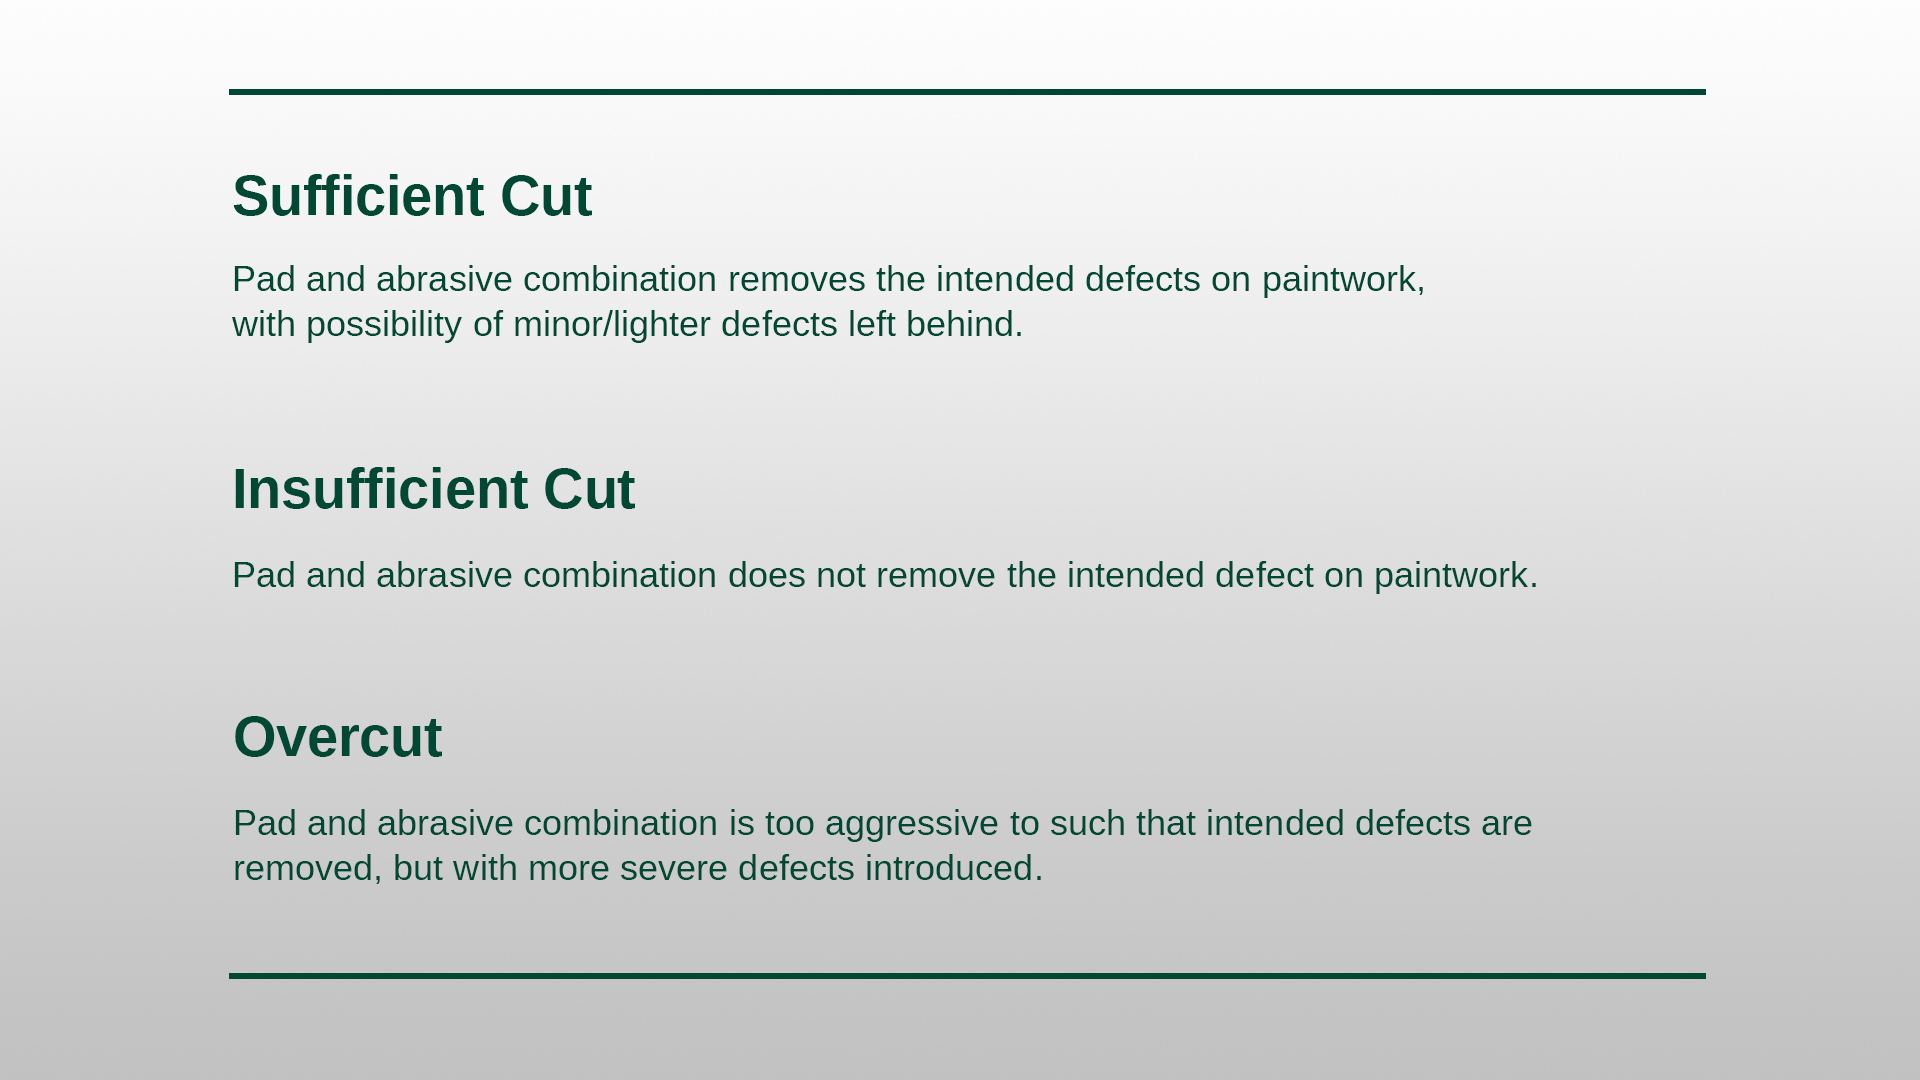
For overcut, newer defects/swirls will most likely emerge. For example, while trying to remove waterspots or light marring, thicker/deeper swirls emerge from the combination.
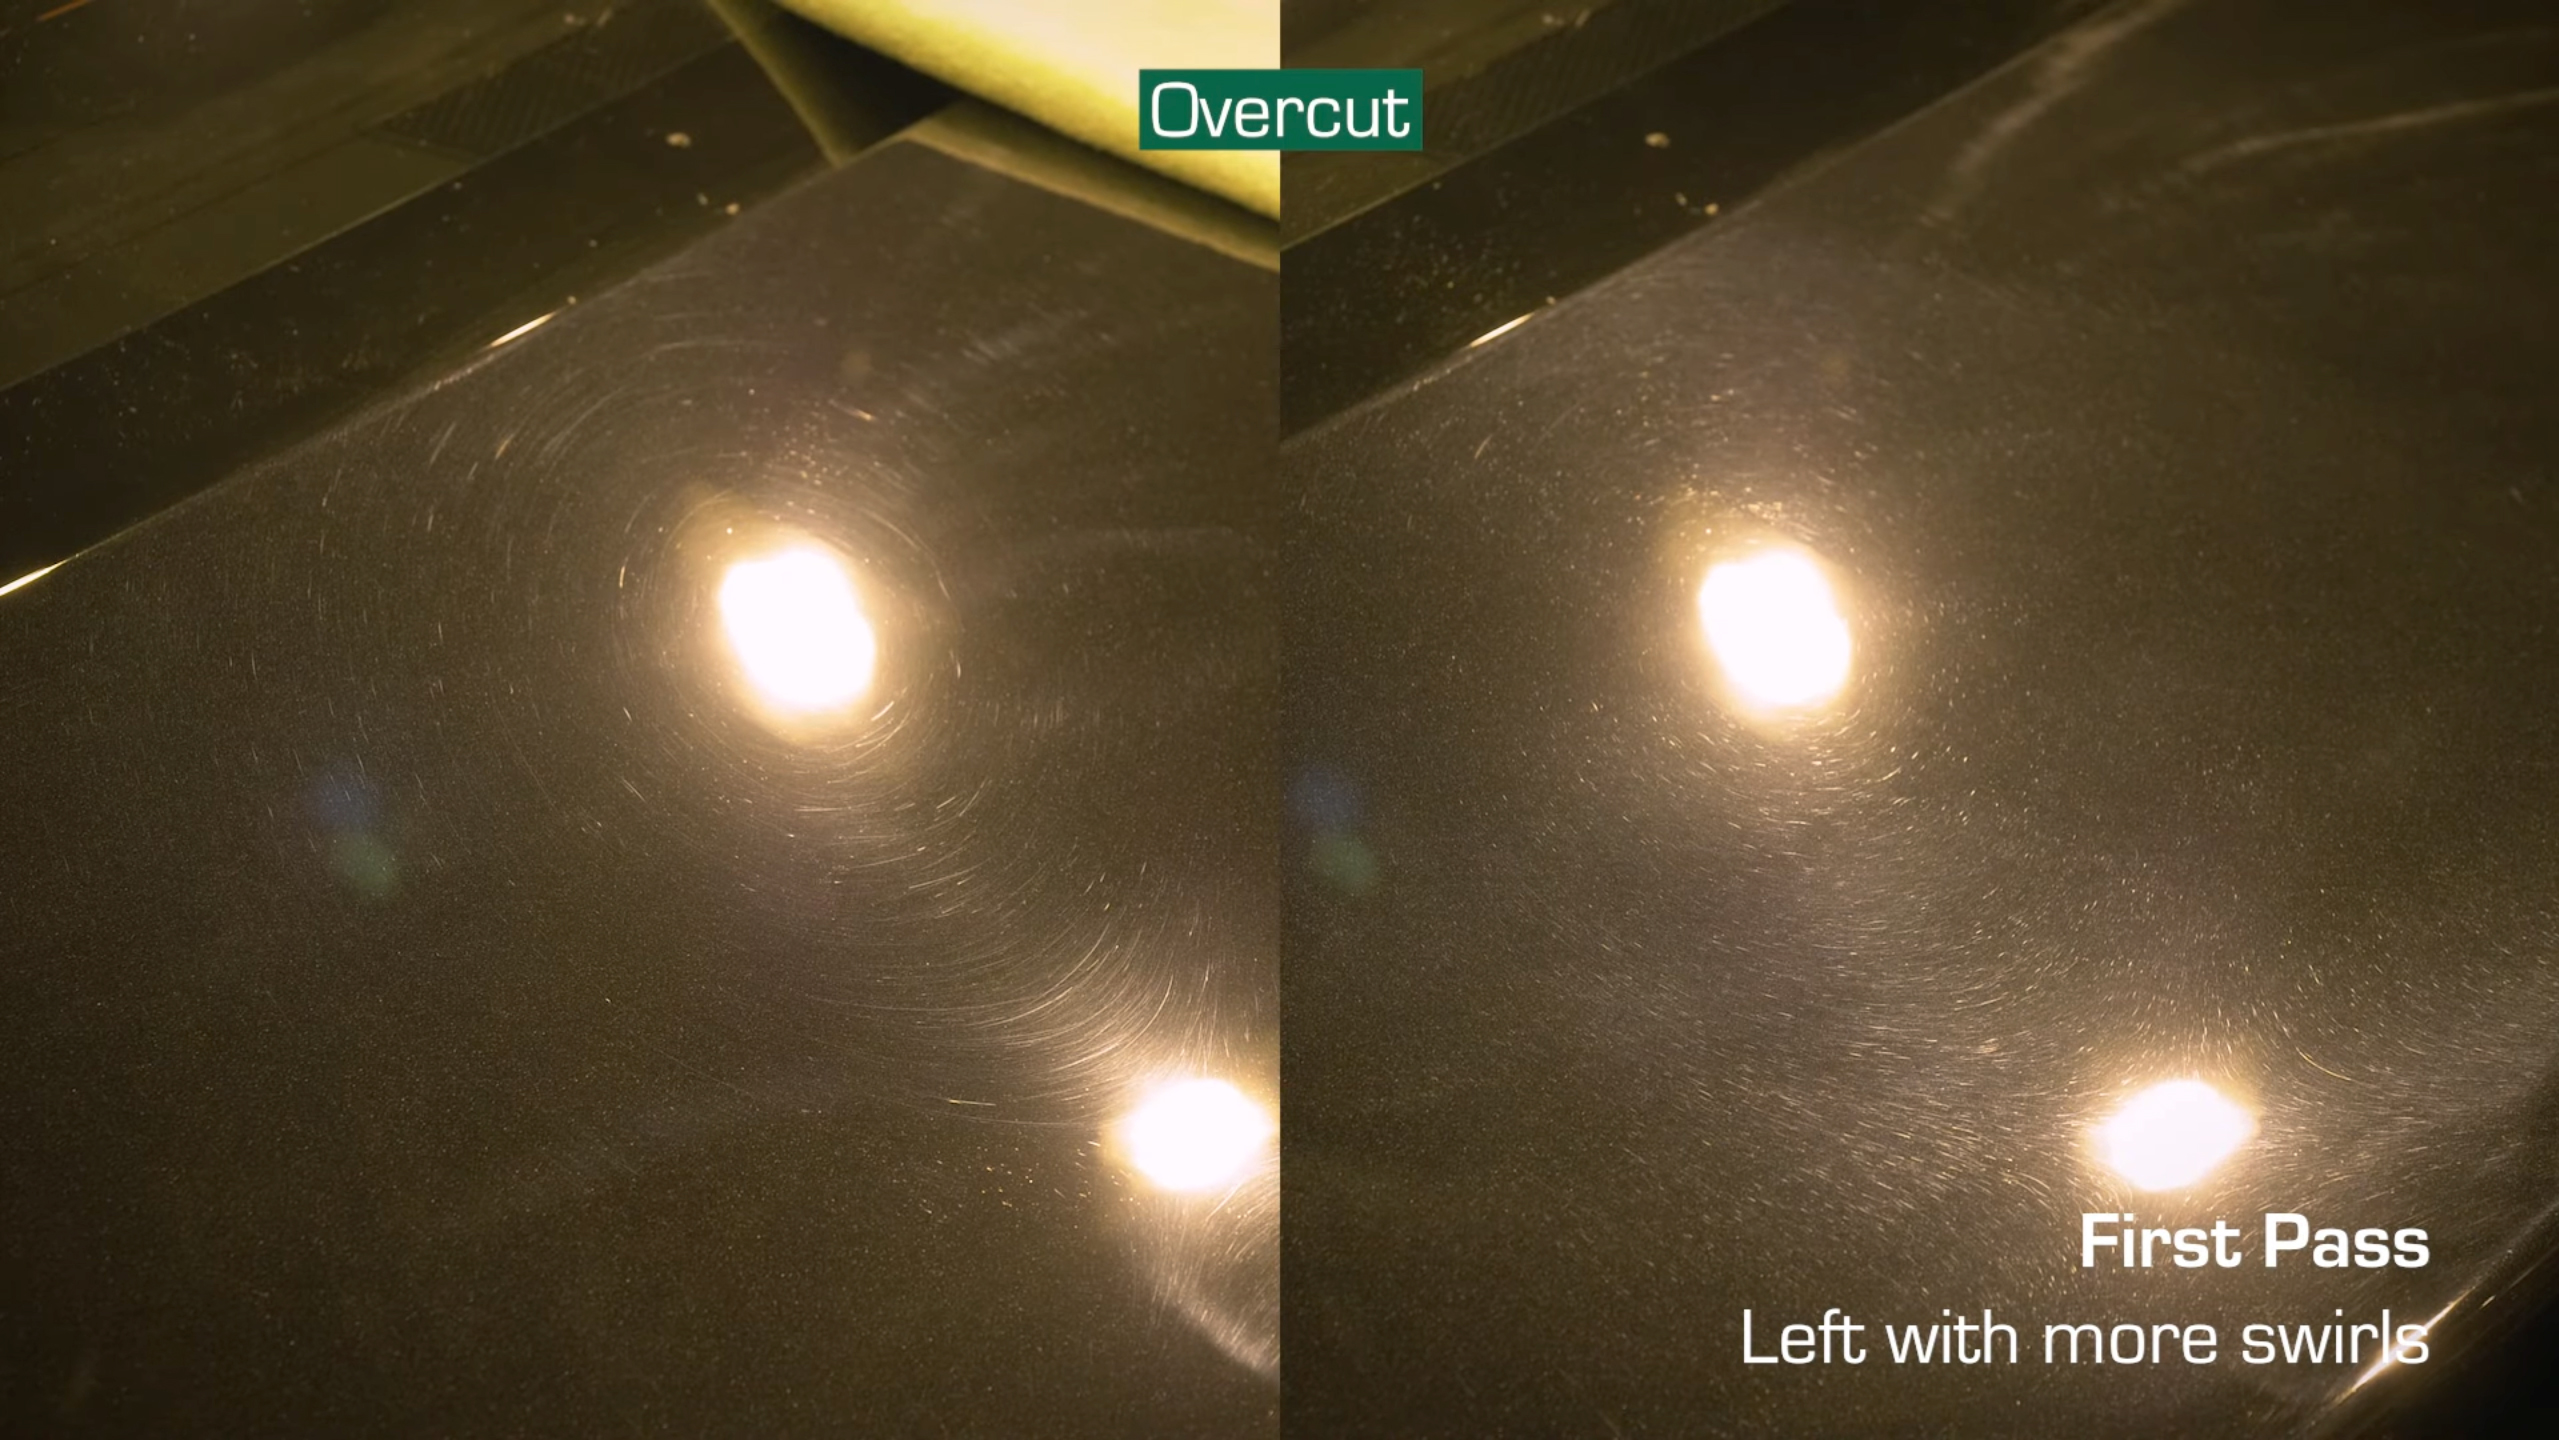
For insufficient cut, the most common trait of it is that there will be not many changes to the defects. For example, trying to remove swirls, yet after polishing, there is subtle to no changes of defect at all.
For sufficient cut: Original defect being removed greatly, with possibilities of lighter defects. (Ie: swirls to micro-swirls)
So knowing if we have to achieve overcut or insufficient cut, we may increase our cutting accordingly:
- Overcut = reduce cutting strength
- Insufficient cut = Increase cutting strength.
Approaching paintwork correction and polishing defects has no fixed formulation as every paint is different (in types of paint and defects).
Ultimately, adjusting cutting strength of polishing combination will require one to understand the aggressiveness of pads and abrasives, and the cutting results on paint to adjust accordingly.
If you wish to understand further, we put together a video that illustrates this comprehensively
Get in touch with us if you have further questions on polishing combination at [email protected]
Happy detailing!